

For some, the deadlift can be as simple as walking up to the bar and picking it up. Perfecting your deadlift technique however, with long term pain-free progress in mind, can be a slightly more complex beast.
Whether it be the deadlift or any of the other core barbell exercises, there comes a point where plateaus arise which highlight your true understanding of the movement. Weak points in your technique are exposed and cues to correct errors are shouted from all corners of the weight room. Each cue may hit your ears slightly differently, and results may vary.
How you interpret each cue can come down to your individual experiences — what resonates and works best may not be the same as the lifter beside you. With that in mind, here are the best deadlift cues you should be trying, like, yesterday.
Best Deadlift Cues
- Foot Cues
- Knee Cues
- Hip Cues
- Lat Cues
- Breathing Cues
- Bracing Cues
- Upper Back Cues
- Pulling Cues
- Lowering Cues
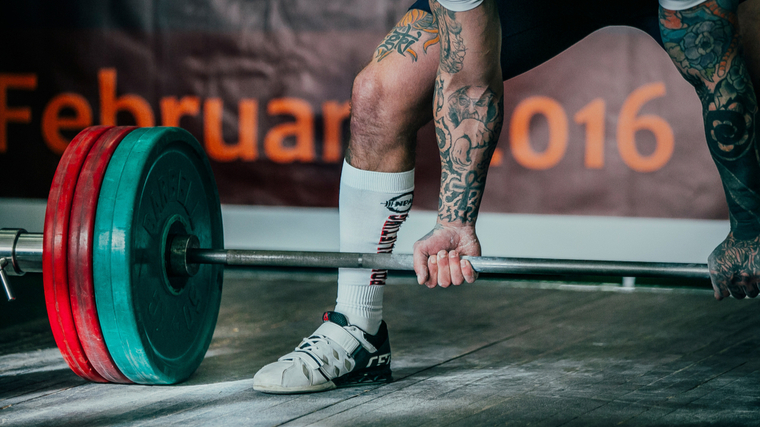
Foot Cues
The foot is responsible for setting the stage for maximal force output. Where (and how) you stand can have a dramatic impact on your success with maximal loads. However, over the course of training you’ve probably found yourself leveraging your position in certain ways that feel really strong for a while, but end up being a sticking point shortly thereafter.
Foot Pressure
Foot pressure is an evolving topic when it comes to the deadlift. Whether you’re from a strict powerlifting camp, bias an Olympic lifting style, or use deadlift variations to help build muscle, you have likely heard some combination of cues that leaves you confused as to where exactly you should be placing your foot pressure.
The Intent
The intent of foot pressure cues are twofold. They’re designed to leverage your center of mass by biasing more of your weight towards a certain point(s) on your foot. This way you ideally will find yourself in the strongest position to go full throttle against the bar.
With that in mind, foot pressure cues have also been designed to maximize contact with the ground. Unfortunately, these two cueing perspectives are often at odds with each other when it comes to actual technique. In reality, the strongest and safest foot pressure cue is one that flattens your foot to have the greatest contact with the ground at all times and keeps your bodyweight dead-center in the middle of the foot.
Common Cues
- Tripod foot.
- Heel pressure.
- Pressure along the outside of the foot.
Cues Worth Trying
- Mid-foot pressure.
- Flatten the foot.
- Full-foot contact.
Knee Cues
Knee positioning in the deadlift is, thankfully, pretty straightforward. As the deadlift is primarily rooted in a hinge technique, your knees should only have so many ways in which to operate barring any critical errors in technique.
Knee Tracking
The knees should stay relatively unmoved aside from bending into the starting position and extending during the lift itself. That said, there are times where you may experience your knees buckling in and out, or feel as though they are in the way of the bar during the lift itself. These fixes are actually addressed at the hip, as the gluteal muscles are the ones responsible for much of your knee positioning.
The Intent
In order to control the knees, you must establish a proper hinge position. This will harness the posterior chain to lock your entire body into a mechanically advantageous position. When the knees wobble around or, alternatively, feel as though they are too bent and linger out in front of the bar too long, addressing your utilization of the glutes is the most likely fix.
Common Cues
- Press the knees against the arms.
- Knees out.
Cues Worth Trying
- Hinge.
- Hips Back.
- Root the hips.
Hip Cues
The hips play an integral part in your deadlift technique. They are what anchors the posterior chain, provide immense horsepower during the lift, and prevent you from dumping too much excess force into your back. However, you may experience times where it feels like your hips aren’t pulling their weight or that they are being inconsistently placed.
Drifting Hips
Your hips may end up either too low from an excessive amount of knee bend (poor wedging), or too high from an excessively arched back. Each of these positions will usually feel really strong at the time, but ultimately undercuts maximum force production because you won’t be able to secure a powerful brace or harness your musculature as effectively.
The Intent
The intent of hip-based cuing is to properly engage in a hinge technique that doesn’t force you into a stiff-legged position. Normally what happens is you fall out of that sweet spot looking to feel a really secure “hinge” and it turns into lumbar hyperextension, or, you’re specifically trying to avoid that and end up bending your knees too much.
Common Cues
- Arch.
- Wedge.
Cues Worth Trying
- Ribs down, hips back.
Lat Cues
The lats play a huge role in controlling the bar position during your deadlift. Without your lats being properly engaged, it’s very common to see the bar kick out too far ahead of you and make the lift nearly impossible to complete. They are also a critical piece in bracing your upper body to protect your spine and transfer as much force as possible.
Setting Up the Lats
In order to harness your lats to their fullest potential, knowing how to engage them properly during the set up will help you finish each rep in the proper position. When you set up for a deadlift you’ll want to be fully locked up and ready to go before you ever start to pull the bar off the ground.
The Intent
The intent behind lat cueing is to control the bar by locking your lats as close to your body as possible. While there are many roads to the same outcome here, trying a few different variations might help you find what resonates. Comparisons to similar exercises such as the straight-arm pulldown may help establish the proper position as well.
Common Cues
- Keep the bar close.
- Drive the bar through your body.
Cues Worth Trying
- Protect your armpits.
- Straight-arm pulldown.
- Pretend you’re squeezing an orange in your armpits.
Breathing Cues
Breathing is sometimes misinterpreted and miscued in most of the big barbell lifts. While well-intentioned, common cues often overkill the intent behind taking a breath and holding it during any of the major lifts.
Take a Breath
In order to maximize a brace for heavy lifting, combining your abdominal muscular brace with an air-pressure reinforced technique called the valsalva is the goal. However, when you over emphasize your breath over the rest of the well-rounded bracing technique, you can often “breath yourself” out of a good position.
The Intent
Breathing during a bracing technique for heavy lifting is designed to take just as much air into your system as necessary to properly increase your intra-abdominal pressure. The critical piece of the puzzle here is that it’s only possible to leverage intra-abdominal pressure if your air intake doesn’t overwhelm your abdominal brace.
Find your sweet spot to fill the abdomen without neglecting the muscular side of things in favor of overly large breaths alone.
Common Cues
- Big air.
- Breathe into your stomach.
Cues Worth Trying
- Fill the canister.
Bracing Cues
Bracing for the pull is a tricky thing to comprehend. The wire-cross comes from trying to keep yourself from exaggerating your torso into a hyperextended position because the pressure from the weight is already trying to round your spine. The key is to find your sweet spot and lock it in, as with the lats, prior to engaging in any lifting.
Brace for Impact
Bracing cues are about establishing full body tension with a particular emphasis on arranging your torso properly to avoid spinal rounding. This is especially important during the deadlift where there is not a whole lot of room for error.
In order to get the most out of your brace and produce the strongest lift, arranging your torso in a neutral position is essential. To be your strongest, you’ll need to lock in your upper back and lats, abs, and hips to truly brace your body for the pull.
The Intent
Often the intent of bracing cues are to protect your back, especially during deadlifts. The issue is when other components of your brace get overlooked to supercharge your upper back or lats, and it has you start your pull while hyperextended. The aim of bracing cues should be to help establish a full circumferential brace, using all muscles on all sides of your body to create a rigid torso.
Common Cues
- Chest up.
- Push into your belt.
- Drive against the bar.
Cues Worth Trying
- Ribcage down.
- Bear down.
Upper Back Cues
Your upper back in the deadlift is a source of enormous strength to keep your spine safe but also a strategic player in putting you in the strongest position possible. It all has to do with what you decide to do with your shoulder blades.
Shoulder Positioning
Shoulder positioning can influence two parts of your deadlift. The ability to keep your upper back flat is one perk, but the other is the ability to shorten the range of motion of the entire exercise. In a game of inches and leverage, the choice of scapular retraction or protraction (reaching) has a huge impact on the leverage you can establish during your deadlift.
The Intent
Your shoulder blades are often cued during many exercises to be tucked back and down. Scapular retraction and depression is seen as a safe and strong way to implement back tension, but if you think about what the goal of your deadlift is (safely lifting the maximum amount of weight possible), pinning the shoulders back and down actually makes your range of motion longer.
A better way of optimizing your shoulder positioning during the deadlift would be to relax your shoulders and allow them to hang while you pull.
Common Cues
- Shoulders back and down.
- Pin the shoulder blades together.
Cues Worth Trying
- Long arms.
- Reach.
Pulling Cues
Once you’ve locked everything in position, actually lifting the bar might be trickier than you thought. There are many variations of the deadlift, most of which will bias certain muscle groups or positions to challenge you in different ways. Pulling from the ground, however, is a very intentional movement designed to harness everything you have in the safest way possible.
Connecting Top and Bottom
The struggle you may encounter is coordinating a torso brace with the act of lifting the bar of the ground with your legs. The struggle may result in a stiff-legged or disjointed style of lifting, or worse, loss of position from wrenching the back into the first pull from the ground.
The Intent
Once you’re in the prime position to pick up the bar, try to minimize how much you’re thinking about. When it comes time to lift heavy, the less you think, the more force you can produce to simply move the bar. This is doubly applicable as it will allow you to simply think about staying tight as a unit instead of moving two distinct parts of your body. That said, some cues have changed with the times to prevent balance issues or loss of position.
Common Cues
- Drive through the heels.
- Grip and rip.
Cues Worth Trying
- Leg press the weight.
- Push the earth away.
Lowering Cues
When you’re going to perform the deadlift for multiple repetitions, the way that you lower the bar back towards the ground should be a complete reversal of how you brought it up. It seems simple enough, but there are major implications for unlocking your body tension — keep everything tight and unified for the best possible outcome.
Going Down
The hip hinge is how you should initiate your descent between repetitions. The hip hinge is an integral part of the deadlift in general, but it is the focal point of a controlled descent. Keeping the knees soft while sending the hips back will allow the bar to travel down unimpeded by your own body. This means that tension won’t be awkwardly distributed against your back or smaller muscle groups as you try to navigate around your own body.
The Intent
In order to complete the safest and strongest deadlift technique, retaining full body tension throughout the set is a great strategy. To do this, staying tight and properly hinging from the top of the lift down will be your primary goal. Cues should focus on retaining that strong posterior chain posture, only adding the necessary knee bend to reach the ground when the bar has already cleared them.
Common Cues
- Drop the bar.
Cues Worth Trying
- Core tight, hips back.
- Controlled descent.
When to Use Cues
Cues are part of the learning process for building a highly skilled movement pattern. When you’re practicing a new exercise, or reaching the first wave of sticking points, reinforcement of certain technical cues is essential. When you train, you should use cues to address specific noticeable errors in technique or performance.
A great rule of thumb is to track your cues or self-talk during your preparation for each training session. Keeping notes on the cues you need to reinforce technical corrections or positions is a fantastic way to have them fresh in your mind leading into the workout itself. Take some time to review your cues the night before or during your warm-ups to best reinforce them.
Who Should Use Cues
Cues are a great tool for anyone, not just for barbell training or strength athletes. Cues can be extremely beneficial for reinforcing technical points for almost every lift — from skilled endurance athletes, to bodybuilders, or weightlifters.
More specifically, you will likely need to introduce cues slowly and update them as you gain more training experience. Keep your list of cues relevant for what’s working as you get stronger at the technique and slowly wean them down to essentials over time.
Understanding Cues
Cues are an important part of perfecting any skill — but at the same time a cue is just a word or phrase. The underlying benefit of choosing your cues comes down to how you actually interpret and put them into practice. Knowing the intent behind any cue is as important as the cue itself.
In practice, a cue should be a short, easily recognizable word or phrase that triggers you to unconsciously correct an error in real time. Refine your own cues to whatever language helps you understand and perform an exercise properly.
Wrapping Up
The deadlift can simultaneously be the most straightforward expression of brute strength or a wildly complex physical task. Depending on your level of athleticism and natural affinity for the hip hinge, it could take some cueing to get you in the proper position to pull some serious weight.
It doesn’t matter if you’re brand new to the gym or are already a five-plate-puller. The right word at the right time could be just the thing to take your deadlift to the next level. Audit your deadlift training with some of these cues and watch your numbers blow up.
Featured Image: Miljan Zivkovic / Shutterstock
The post The 9 Best Deadlift Cues You Should Be Using, Like, Yesterday appeared first on BarBend.