Extreme How To - DIY Home Improvement
Installing a new garage door and opener may seem daunting at first, but if you take your time and do the job step-by-step, its a good weekend project. It will take from nine to 12 hours for most doors, then another two to four hours for the opener. You will need help for some portions, such as lifting out the old door and lifting the new door up until the tension springs can be installed (some doors may weigh up to 400 pounds). You may need to remove an old door, or you may be installing in new construction.
The door shown was purchased at our local Lowes store. The information shown here is for that particular door. Make sure you carefully follow the manufacturers instructions for your particular door, especially the instructions for safe installation and use of the door. The instructions included here are shortened due to space constraints.
Do remember that during the installation, the garage will be open and unsecured when disassembling the old door and assembling the new door. And, once you start the installation, if the garage door is the only opening into the building, make sure you have all the tools inside and the time and help required to complete the chore.
Tools Required
Needed are C-clamps or locking pliers, hammer, screwdriver, tape measure, level, socket wrench set, pliers, drill and 1/4-, 3/16- and 3/8-inch bits, stepladder, and sawhorses for holding the sections during assembly. I also suggest a small air-driven impact wrench and sockets, which cut at least an hour off the assembly. You will need some additional materials, including light household oil and materials for the rear track hangers. These are not supplied with the door due to ceiling height differences. This includes a punched angle for the rear hangers, 1-1/4-by-1-1/4-inch with a minimum angle of at least 13 gauge, or 3/32-inch thick. Eight 3/8-by-1-inch bolts and nuts for rear track hangers; six 5/16-by-1-1/2-inch lag screws for rear track hangers; ten 10d 3-inch nails and stop molding are also needed.
Removing the Old Door
The manufacturers instructions for our door included information on removing the old door. Garage doors use two different types of springs to balance the weight. Either torsion or extension springs are used to provide the assisting power in opening and closing the door. Look at your old door and determine which type it is.
Removing the old door can be dangerous if you dont follow instructions, use the right tools and have help. Serious injury can occur if spring tension has not been released before other work begins. You will need one or more helpers. Lift the door to the fully open position, then place C-clamps or locking pliers tightly on both sides of the track to hold the door securely in place. Unhook the cable and springs from each end, and then remove the spring assembly or extension springs. Place a couple of 4-by-4 wood blocks on the floor under the door location, and then with help, remove the C-clamps and lower the door. You wont feel much weight at first, but as the door is lowered it becomes progressively heavier. Make sure to keep all hands and fingers clear of section joints, track and other door parts while the door is coming down.
Now the hard part is done. Starting at the top section, remove the hardware then the door sections one at a time. Remove all remaining track and hardware. You may be able to reuse the hangers at the rear end of the overhead tracks if they are the right size and not deteriorated. Do not attempt to use the old track for the new door.
Installing the New Door
Follow instructions for preparing the opening. The door shown requires 2-by-6 jambs. Door stop molding is then temporarily nailed to the jamb edges and flush with their inside edges.
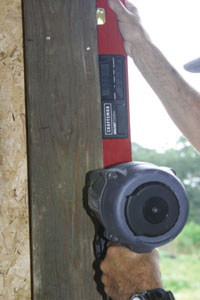
First step is to build a solid jamb to support the track.
2 x 6s are recommended.
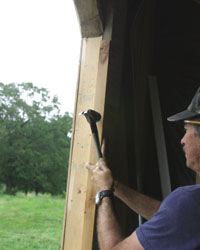
The next step is to temporarily nail the outside door stop in place, flush with the inside edge of the jamb.
Spread all door parts out on the garage floor in groups so you can readily find parts. Cover the tops of a pair of saw horses with carpet scraps for assembling the sections. Assemble the bottom section first, according to the manufacturers directions. Also, install the lift handle according to the instructions.
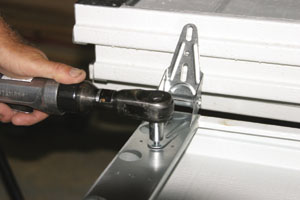
Lay the sections on a pair of padded sawhorses and assemble. An air impact wrench makes assembly quick and easy, but dont over tighten screw or bolts.
Position the bottom section in the opening so it is against the stop molding and centered from side to side. Level the section, adding shims as necessary. Then drive a nail into the door jambs on either side, and against the door section. Slant or slightly bend the nail to hold the door section securely in place.
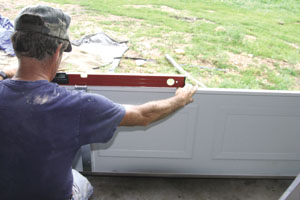
With the first section assembled, position it in place and level it using shims and a carpenters level.
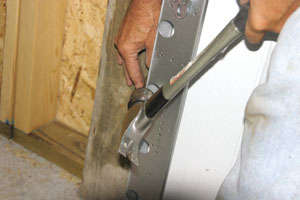
Temporarily fasten the section in place using 16d nails driven into the jamb and angled to hold the section against the jamb.
Assemble and stack the remaining sections in place, anchoring them securely in place with the nails. Fasten the sections together as you go with the hinges, according tothe manufacturers instructions. Once all sections are installed then place the rollers in the sections roller supports.
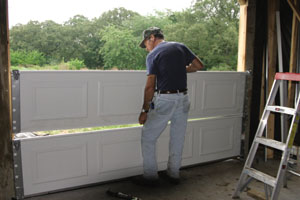
Assemble the remaining sections, fitting each down on top of the other.
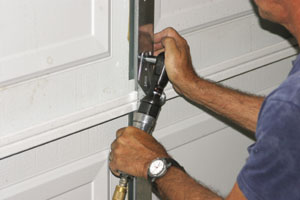
As you fit the sections in place, fasten them together according to manufacturers instructions.

Continue temporarily holding the sections in place with nails angled against their sides.
Next, assemble the track. Loosely fasten the support brackets in place. Then place the track over the rollers and position the track so the rollers are all the way in the hinges. Dont crowd the track against the rollers, however, or you may cause the door to bind.
Once the track is properly positioned, drill pilot holes for the lag screws and fasten the tracks holding brackets to the jambs. Once the tracks are installed, fasten the brackets securely to the tracks.
Then fasten the curved track sections in place to the horizontal sections. Temporarily support the outer ends of the horizontal tracks from the ceiling with a stepladder or rope, and then fasten the curved track sections and angle brackets to the vertical tracks.
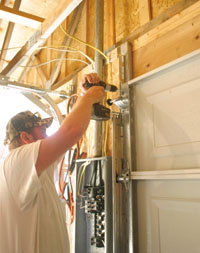
Assemble and fasten the vertical tracks in place.
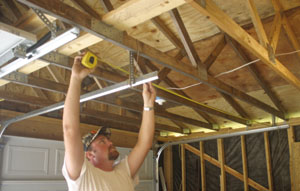
The horizontal tracks and front supports are assembled and the tracks temporarily supported by ropes or wire. Its important the tracks be square with the door and each other.
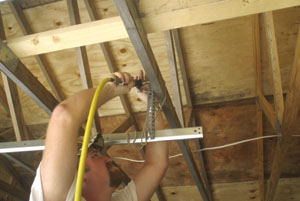
Once the outer ends of the horizontal tracks are located, punched-metal supports are installed to hold the tracks and door in place.
Make up the rear track hangers and anchor them to the ceiling. It is extremely important to position these correctly. The tracks must be level, and square with the door as well as with each other. Measure diagonally between one of the hangers and the door corner, then measure the opposite hanger to door corner. The measurements should be the same. If not, adjust so the tracks are no less than 1/2 inch out of square. Also make sure the measurements between the tracks are the same as at the door. Then fasten the tracks to the rear hangers. Make sure the hangers are solidly supported to carry the weight of the raised door. Adjust the top door section rollers so the top section is tight against the jamb. Install the exterior or interior locks as desired. Then install the pull rope on manually operated doors.
Assemble and install the springs according to the manufacturers instructions. With a helper or two, carefully raise the door to about half way and prop it open on sawhorses or other strong support. Make sure the horizontal tracks are parallel with each side of the door and that the rollers are not out of the top brackets more than 1/2 inch. Readjust the rear hangers if necessary. Again with a helper or two, carefully raise the door into full open position and use C-clamps on the tracks to hold it in place. As you raise the door further, make sure the horizontal tracks are parallel and the rollers dont come out of the hinges or brackets. Fasten the spring assembly to the door and attach safety spring holders, following the manufacturers instructions. Adjust the spring tension according to manufacturers directions so the door opens and closes easily.
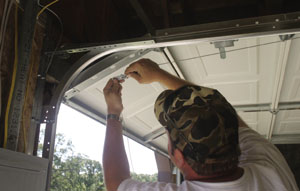
The springs and spring hardware are then installed.
Installing an Automatic Opener
It will take about a half day to add a garage door opener to your new door. Remove the pull rope if installing an opener to prevent strangulation or injury to children. All locks should also be disabled or removed. The door we purchased came with an automatic opener bracket and strengthener. This should be installed following the instructions. The opener we installed was a new Craftsman Belt-Drive Garage Door Opener with Battery Back-up. The following information is for that particular opener. Make sure you follow instructions with your particular opener, including safety instructions. Do not install the opener on an unbalanced or unlubricated door. The tools required include; a stepladder, level, drill and 3/16-, 5/16- and 5/32-inch bits, tape measure, socket set and wrench, pencil, wire cutters, pliers, locking pliers, hammer, hack saw, screwdriver and adjustable end wrench.
Before installing, examine the door and surrounding construction. You may need additional materials in order to safely install the door opener. The header bracket for the opener must have a solid support. If you have a finished ceiling in the garage, a support bracket and fastening hardware may be required. You may also need wooden blocks or extension brackets to install the sensors. If your door is more than 7 feet high, youll need a rail extension kit. With the door down, check the gap between the door and the floor. The gap must not be more than 1/4 inch, or the safety reversal system may not work properly. Repair the floor to eliminate any gaps.
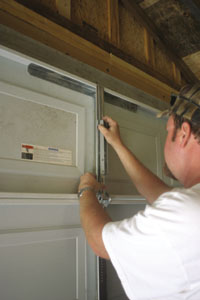
If the door is to have an opener, door stiffeners are installed, according to manufacturers instructions. They are supplied by most manufacturers. Then the attachment bar for the garage door opener is installed.
First step is to open the carton and lay out all parts. Consult the manufacturers instruction book and determine if you have all parts. Then assemble the rail and install the trolley on the rail. Fasten the rail to the motor unit and install the idler pulley. The opener shown is belt driven, and the next step is to install the belt and set the belt tension.
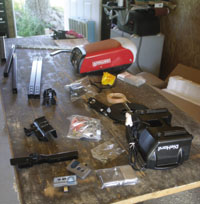
First step in installing the garage door opener is to lay out the components and make sure you have all parts and understand where they go.
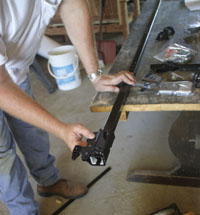
Assemble the track, carrier and opener into one unit.
Installation methods may vary according to the type of garage door you have. Make sure you follow instructions for your specific brand and type of door. Fasten the header bracket in place and attach the rail to the header bracket. Swing the opener/track assembly up in place and support it with a 2-by-4 laid flat across the tracks. Hang the motor/track in place with the appropriate hanging bracket. Remove the 2-by-4 and operate the door manually. If the door strikes the rail, raise the header bracket.
Install the door control in place and run bell wire to the opener. Install the emergency release handle and place the light bulb in place. The opener must have an electrical supply. This can be either a grounded receptacle, or be permanently wired following local codes. Then install the sensors or protector system according to manufacturers instructions. Install the door bracket and connect the door arm to the bracket and trolley. Adjust the travel limits and force of the opener. After this is all done, make sure you test the safety reversal and protector systems according to the opener manufacturers instructions. Finally, install the safety labels supplied with the door and/or opener.
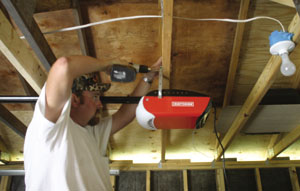
Fasten the opener in place using punched metal support bars.

In the case of the Craftsman unit shown, the battery
backup is then installed.
